


Installing a frame for an outdoor LED display module is a crucial step that ensures the stability, protection, and optimal performance of the display. As a trusted supplier of Outdoor LED Display Modules, I'm here to guide you through the process, sharing insights and best practices based on our extensive experience in the industry.
Understanding the Importance of a Frame
Before delving into the installation process, it's essential to understand why a frame is necessary for an outdoor LED display module. A well - designed frame provides structural support, protecting the delicate components of the display from physical damage caused by wind, rain, and accidental impacts. It also helps in maintaining the alignment of the LED modules, ensuring a seamless and uniform display.


Selecting the Right Frame
The first step in installing a frame for an outdoor LED display module is selecting the appropriate frame material and design. There are several factors to consider when making this decision:
- Material: Common frame materials include aluminum, steel, and plastic. Aluminum frames are lightweight, corrosion - resistant, and easy to install, making them a popular choice for outdoor applications. Steel frames, on the other hand, offer greater strength and durability but are heavier and more prone to rust if not properly coated. Plastic frames are cost - effective and lightweight but may not be as durable as metal frames in harsh outdoor environments.
- Size and Compatibility: Ensure that the frame is the right size for your LED display module. It should provide a snug fit without putting excessive pressure on the module. Check the dimensions of the module and compare them with the frame specifications to ensure compatibility.
- Weather Resistance: Since the display will be exposed to the elements, the frame should be weather - resistant. Look for frames with a powder - coated finish or other protective coatings that can withstand UV rays, moisture, and temperature variations.
Tools and Materials Needed
To install the frame for your outdoor LED display module, you'll need the following tools and materials:
- Screwdriver: A Phillips or flat - head screwdriver, depending on the type of screws used in the frame.
- Drill: If you need to make holes for mounting the frame, a drill with appropriate drill bits will be necessary.
- Level: To ensure that the frame is installed straight and level.
- Measuring Tape: For accurate measurement of the installation area and the frame.
- Mounting Hardware: This may include screws, bolts, brackets, and anchors, depending on the installation method and the type of surface where the display will be mounted.
- Safety Equipment: Safety glasses, gloves, and a ladder (if working at height) to ensure your safety during the installation process.
Step - by - Step Installation Process
Step 1: Prepare the Installation Area
- Clean the Surface: Remove any dirt, debris, or obstacles from the surface where the display will be mounted. This will ensure a smooth and secure installation.
- Mark the Mounting Points: Use a measuring tape and a level to mark the positions where the frame will be attached. Make sure the marks are straight and evenly spaced.
Step 2: Assemble the Frame
- Follow the Instructions: If the frame comes in multiple pieces, carefully follow the manufacturer's instructions to assemble it. This may involve connecting the frame sections using screws or other fasteners.
- Check for Alignment: Once the frame is assembled, use a level to check that it is straight and level. Make any necessary adjustments before proceeding.
Step 3: Mount the Frame
- Attach the Mounting Hardware: Depending on the type of surface, use the appropriate mounting hardware to attach the frame to the wall or other structure. For example, if mounting on a concrete wall, you may need to use concrete anchors and bolts. If mounting on a wooden surface, screws may be sufficient.
- Secure the Frame: Tighten the screws or bolts securely to ensure that the frame is firmly attached to the surface. Use a torque wrench if necessary to ensure that the fasteners are tightened to the correct specifications.
Step 4: Install the LED Display Module
- Place the Module in the Frame: Carefully place the LED display module into the frame, ensuring that it is centered and aligned properly.
- Secure the Module: Use the provided mounting brackets or clips to secure the module to the frame. Make sure the module is firmly attached and does not move or rattle.
Step 5: Connect the Wiring
- Follow the Wiring Diagram: Refer to the wiring diagram provided with the LED display module to connect the power and signal cables. Make sure to use the correct connectors and follow the proper polarity.
- Secure the Wiring: Once the cables are connected, use cable ties or other methods to secure the wiring and prevent it from getting tangled or damaged.
Step 6: Test the Display
- Power On the Display: After the installation is complete, power on the LED display module to test its functionality. Check for any dead pixels, color inconsistencies, or other issues.
- Adjust the Settings: If necessary, adjust the brightness, contrast, and other settings of the display to achieve the desired visual效果.
Maintenance and Troubleshooting
- Regular Cleaning: To keep the display looking its best, clean the frame and the LED module regularly using a soft, dry cloth. Avoid using abrasive cleaners or solvents that may damage the surface.
- Inspect for Damage: Periodically inspect the frame and the display for any signs of damage, such as cracks, loose screws, or water ingress. Address any issues promptly to prevent further damage.
- Troubleshooting: If you encounter any problems with the display, such as flickering or no power, refer to the troubleshooting guide provided with the module. Check the power supply, wiring connections, and other components to identify and fix the issue.
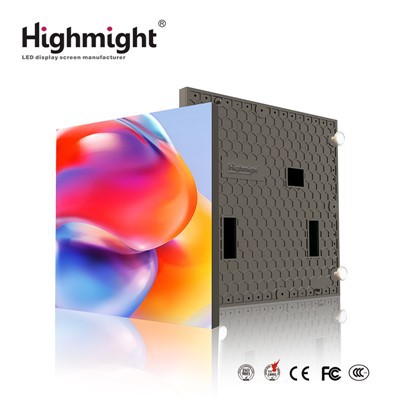
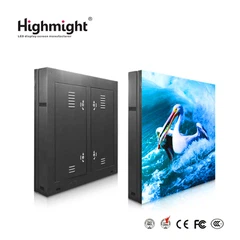
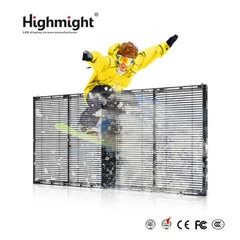
Our Outdoor LED Display Modules
As a leading supplier of Outdoor LED Display Modules, we offer a wide range of products to meet your specific needs. Our Waterproof LED Module is designed to withstand harsh weather conditions, ensuring reliable performance even in rainy or humid environments. The High Brightness Outdoor LED Module provides excellent visibility in bright sunlight, making it ideal for outdoor advertising and public information displays. And our Energy - saving Outdoor LED Modules help you reduce energy consumption without compromising on quality.
If you're interested in purchasing our Outdoor LED Display Modules or have any questions about the installation process, we encourage you to contact us for a detailed consultation. Our team of experts is ready to assist you in finding the right solution for your project.
References
- LED Display Installation Guide, Industry Standard Publication
- Outdoor Lighting Handbook, Lighting Manufacturers Association