


In today's large-scale concerts, international conferences and exhibitions, LED rental screens have become an important core equipment for creating stunning visual effects. According to statistics, professional LED rental screens can increase the audience participation at the event by more than 30%, but omissions/misinstallations during the installation process may also result in millions of losses. So, how are these huge and exquisite display screens safely and efficiently built in a short time?
Preparation before installation
Site survey:
Load-bearing and structural assessment: Our professional engineers will use laser rangefinders and load-bearing testers to analyze the site's load-bearing capacity, space dimensions and obstacle locations. There was a music festival where the underground structure was found to be insufficiently load-bearing, causing some screens to tilt. Fortunately, it was discovered in time and no damage was caused.
Environmental measurement: Measuring ambient brightness (determining that the screen brightness must be above 5000nit), sight angle and power supply position directly affects the selection of screen parameters and subsequent viewing effects.
Equipment and materials
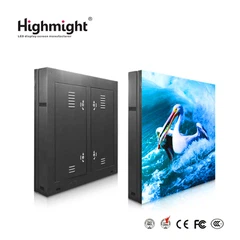
Cabinet selection: Our rental screen uses an aluminum alloy cabinet, which is more than 30% lighter than traditional cabinets and has a strength increase of more than 2 times.
List of professional tools:
·Steel structure installation: laser level, high-strength bolt wrench
·Electrical connection: multimeter, crimping pliers, anti-static wristband
·Module debugging: special calibration equipment, signal generator
Form a professional team
An experienced installation team usually includes steel structure engineers, electrical specialists and screen debuggers. The team that provided services for the Olympic Games revealed that they were able to complete the construction of a 200 square meter screen within 2 hours. The secret lies in the precise division of labor: a collaborative working mode of the frame group (3 people) + module installation group (4 people) + line group (2 people).
Analysis of the core installation process
Main frame construction:
Adopting a truss system, the main body is a galvanized square tube of customized size
Fix each node with high-strength bolts
Horizontal calibration error ≤ 2mm
The art of modular cabinet installation
Snap-on cabinet installation:
There are snap-on designs on both sides of each cabinet, which can be firmly locked with another cabinet, and the screen error is less than 2mm, and the human eye can hardly see the dividing line of the screen.
Power supply system:
Based on the configured bottle parameters, we will calculate the size and quantity of power supply required for your screen to ensure that the LED display will not have problems such as black screen, insufficient power supply or excessive power waste.
Triple verification of system debugging
Our professional team will use CalMAN color calibration software to ensure that the human eye cannot distinguish the color difference level of ΔE<2

Installation method
Hoisting scheme
Safety specifications:
Single-point hoisting weight ≤ 200kg
Hoisting height and width ratio 1:0.8 (10m high screen width ≤ 8m)
Adopt cone-rod connection mechanism, wind-resistant swing design
Fast stacking on the ground
Support daily disassembly and assembly for tours
Modular base can be expanded and combined
Safety and maintenance
Do not cross the safety red line
Personal protection: full-body safety belt (high-altitude operation), anti-puncture shoes (steel frame installation)
Electrical safety: ground resistance <4Ω, leakage protection 30mA/0.1s response
Emergency plan: 1 emergency power-off button per 100㎡
Smart maintenance system
Real-time monitoring: temperature/humidity/voltage of each box
Predictive maintenance: 3 hours in advance warning of potential failures


