
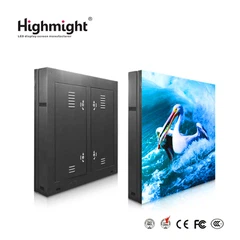


As a seasoned supplier of indoor LED modules, I've witnessed firsthand the transformative power of these cutting-edge technologies in enhancing indoor spaces. Suspended indoor LED modules, in particular, offer a unique blend of visual impact and flexibility, making them a popular choice for a wide range of applications, from corporate lobbies and retail stores to event venues and entertainment complexes. In this blog post, I'll share my insights on the installation methods for suspended indoor LED modules, providing you with a comprehensive guide to ensure a successful and seamless installation process.
Understanding Suspended Indoor LED Modules
Before delving into the installation process, it's essential to understand the key features and benefits of suspended indoor LED modules. These modules are designed to be hung from the ceiling or other overhead structures, creating a dynamic and immersive visual experience. They typically consist of multiple LED panels that are interconnected to form a larger display surface. Suspended LED modules offer several advantages over traditional wall-mounted displays, including:
- Enhanced Visual Impact: By suspending the LED modules from the ceiling, you can create a floating effect that draws attention and enhances the overall visual impact of the display. This is particularly effective in large open spaces or areas with high ceilings.
- Flexibility and Customization: Suspended LED modules can be easily adjusted and repositioned to suit the specific requirements of your space. They can also be customized in terms of size, shape, and resolution, allowing you to create a unique and personalized display that meets your exact needs.
- Improved Viewing Angles: Unlike wall-mounted displays, suspended LED modules offer a wider viewing angle, ensuring that the content is visible from multiple perspectives. This makes them ideal for applications where the display needs to be viewed from different areas of the room.
Pre-Installation Preparation
Proper preparation is crucial for a successful installation of suspended indoor LED modules. Here are some key steps to take before you begin the installation process:
- Site Survey: Conduct a thorough site survey to assess the suitability of the installation location. Consider factors such as ceiling height, structural integrity, electrical supply, and access to the installation area. This will help you determine the best installation method and ensure that the necessary infrastructure is in place.
- Design and Planning: Work with your design team or a professional installer to create a detailed installation plan. This should include the layout of the LED modules, the mounting locations, the electrical connections, and any other relevant details. Make sure to consider the intended use of the display and the viewing distance when designing the layout.
- Materials and Tools: Gather all the necessary materials and tools for the installation. This may include the LED modules, mounting brackets, cables, power supplies, and any other components required for the specific installation method. Make sure to use high-quality materials and tools to ensure the longevity and reliability of the display.
- Safety Precautions: Prior to starting the installation, take all necessary safety precautions to protect yourself and others. This may include wearing appropriate personal protective equipment (PPE), such as safety glasses, gloves, and hard hats, and following all relevant safety guidelines and regulations.
Installation Methods
There are several different installation methods for suspended indoor LED modules, each with its own advantages and considerations. The choice of installation method will depend on factors such as the size and weight of the LED modules, the ceiling structure, and the desired aesthetic effect. Here are some of the most common installation methods:
Cable Suspension System
The cable suspension system is a popular choice for suspending indoor LED modules, especially in large open spaces or areas with high ceilings. This method involves using cables or wires to hang the LED modules from the ceiling. Here's how it works:
- Mounting Brackets: Install mounting brackets on the ceiling at the desired locations. These brackets should be securely attached to the ceiling structure and capable of supporting the weight of the LED modules.
- Cables or Wires: Attach cables or wires to the mounting brackets and run them down to the LED modules. Make sure the cables are long enough to allow for the desired height adjustment and that they are properly tensioned to prevent sagging.
- LED Module Installation: Hang the LED modules from the cables or wires using appropriate hardware, such as hooks or clips. Make sure the modules are level and properly aligned with each other.
- Electrical Connections: Connect the LED modules to the power supply and any other necessary electrical components, such as controllers or signal sources. Make sure all electrical connections are secure and properly insulated to prevent electrical hazards.
Truss System
The truss system is another popular option for suspending indoor LED modules, particularly for large-scale installations or events. This method involves using a truss structure to support the LED modules. Here's how it works:
- Truss Assembly: Assemble the truss structure according to the manufacturer's instructions. Make sure the truss is securely connected and properly braced to ensure its stability.
- Mounting Brackets: Install mounting brackets on the truss at the desired locations. These brackets should be designed to fit the specific type of LED modules you are using and should be capable of supporting the weight of the modules.
- LED Module Installation: Hang the LED modules from the mounting brackets using appropriate hardware, such as bolts or clamps. Make sure the modules are level and properly aligned with each other.
- Electrical Connections: Connect the LED modules to the power supply and any other necessary electrical components, such as controllers or signal sources. Make sure all electrical connections are secure and properly insulated to prevent electrical hazards.
Ceiling Grid System
The ceiling grid system is a convenient and cost-effective option for suspending indoor LED modules in commercial or office spaces. This method involves using a standard ceiling grid system to support the LED modules. Here's how it works:
- Ceiling Grid Installation: Install the ceiling grid system according to the manufacturer's instructions. Make sure the grid is level and properly aligned to ensure a smooth and even installation.
- Mounting Brackets: Install mounting brackets on the ceiling grid at the desired locations. These brackets should be designed to fit the specific type of LED modules you are using and should be capable of supporting the weight of the modules.
- LED Module Installation: Hang the LED modules from the mounting brackets using appropriate hardware, such as clips or hooks. Make sure the modules are level and properly aligned with each other.
- Electrical Connections: Connect the LED modules to the power supply and any other necessary electrical components, such as controllers or signal sources. Make sure all electrical connections are secure and properly insulated to prevent electrical hazards.
Post-Installation Testing and Maintenance
Once the installation is complete, it's important to conduct thorough testing and maintenance to ensure the proper functioning of the suspended indoor LED modules. Here are some key steps to take:


- Testing: Power on the LED modules and test the display to ensure that all the pixels are working properly and that the content is being displayed correctly. Check for any dead pixels, color inconsistencies, or other issues and address them as needed.
- Calibration: Calibrate the LED modules to ensure accurate color reproduction and brightness levels. This may involve adjusting the settings on the controller or using a calibration tool to measure and adjust the display parameters.
- Maintenance: Establish a regular maintenance schedule to keep the LED modules in good working condition. This may include cleaning the modules, checking the electrical connections, and replacing any faulty components as needed.
Conclusion
Installing suspended indoor LED modules requires careful planning, preparation, and execution. By following the steps outlined in this blog post and choosing the right installation method for your specific needs, you can ensure a successful and seamless installation that enhances the visual impact of your indoor space. As a leading supplier of LED Screen Module, Indoor Led Display, and Moisture-proof LED Module, we are committed to providing our customers with high-quality products and professional installation services. If you have any questions or need assistance with your indoor LED module installation, please don't hesitate to contact us. We look forward to working with you to create a stunning and immersive visual experience for your space.
References
- LED Display Installation Guide, Manufacturer's Manual
- Lighting Design Handbook, Third Edition, by Rea, M. S.
- Electrical Installation Requirements, IEC 60364


