


As a seasoned supplier of large outdoor LED screens, I've witnessed firsthand the transformative power of these dynamic displays in enhancing brand visibility and engaging audiences. Over the years, I've also encountered numerous situations where the need to replace modules within these screens has arisen. Whether due to wear and tear, technological advancements, or unforeseen damage, module replacement is a crucial skill for maintaining the optimal performance of large outdoor LED screens. In this blog post, I'll share my expertise on how to replace the modules of a large outdoor LED screen, along with some essential tips and best practices.
Understanding the Basics of Large Outdoor LED Screens
Before delving into the module replacement process, it's essential to have a basic understanding of how large outdoor LED screens work. These screens are typically composed of multiple LED modules, which are the building blocks of the display. Each module contains a grid of individual LED lights that emit light when an electrical current passes through them. The combination of these LED lights creates the vibrant images and videos that we see on the screen.
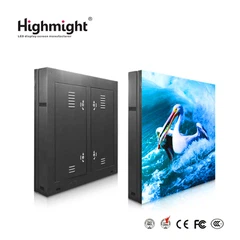
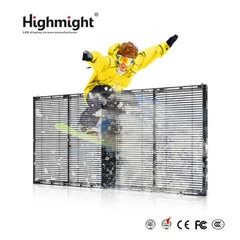
Large outdoor LED screens come in various sizes, resolutions, and configurations to meet the diverse needs of different applications. Some common types of outdoor LED screens include High Brightness LED Outdoor Screen, Waterproof Outdoor LED Screen, and Outdoor LED Advertising Large Screen. Understanding the specific type and model of your LED screen is crucial for ensuring a successful module replacement.
Tools and Materials Required
Before you begin the module replacement process, it's important to gather all the necessary tools and materials. Here's a list of items you'll typically need:
- Replacement LED Modules: Make sure you have the correct type and model of LED modules that are compatible with your screen. It's always a good idea to order a few extra modules in case of any issues.
- Screwdriver Set: A set of screwdrivers with different sizes and types will be needed to remove and install the modules.
- Wrench Set: Depending on the screen's design, you may need a wrench to loosen or tighten certain components.
- Anti-Static Wrist Strap: This is essential to prevent electrostatic discharge (ESD) from damaging the sensitive electronic components of the LED modules.
- Cleaning Supplies: You'll need a soft, lint-free cloth and a mild cleaning solution to clean the screen and the replacement modules.
- Safety Equipment: Wear safety glasses, gloves, and other appropriate safety gear to protect yourself during the replacement process.
Preparing for Module Replacement
Before you start replacing the modules, it's important to take some precautions to ensure your safety and the integrity of the screen. Here are some steps to follow:


- Turn Off the Power: Before you begin any work on the screen, make sure to turn off the power supply to avoid the risk of electric shock.
- Discharge Static Electricity: Wear an anti-static wrist strap and touch a grounded metal object to discharge any static electricity from your body.
- Inspect the Screen: Carefully inspect the screen for any signs of damage or wear. Look for loose connections, broken wires, or other issues that may need to be addressed before replacing the modules.
- Document the Layout: Take photos or make a diagram of the screen's layout before removing any modules. This will help you remember the correct placement of the modules when reinstalling them.
Removing the Old Modules
Once you've prepared the necessary tools and taken the appropriate safety precautions, you can begin removing the old modules. Here's a step-by-step guide:
- Locate the Faulty Module: Use the photos or diagram you took earlier to identify the location of the faulty module.
- Remove the Screws: Use a screwdriver to remove the screws that hold the module in place. Depending on the screen's design, the screws may be located on the front, back, or sides of the module.
- Disconnect the Cables: Carefully disconnect the cables that connect the module to the screen's control system. Make sure to label the cables or take photos to ensure correct reconnection later.
- Remove the Module: Gently lift the module out of the screen's frame. Be careful not to damage the surrounding modules or the screen's frame.
Installing the New Modules
After removing the old module, you can proceed with installing the new one. Here's how:
- Clean the Replacement Module: Use a soft, lint-free cloth and a mild cleaning solution to clean the replacement module. Make sure to remove any dust, dirt, or debris from the module's surface.
- Align the Module: Carefully align the replacement module with the empty slot in the screen's frame. Make sure the module is properly seated and aligned with the surrounding modules.
- Connect the Cables: Reconnect the cables to the replacement module, following the labels or photos you took earlier. Make sure the cables are securely connected and there are no loose connections.
- Secure the Module: Use a screwdriver to reinstall the screws that hold the module in place. Make sure the screws are tightened securely, but not too tight to avoid damaging the module.
Testing the New Modules
Once you've installed the new modules, it's important to test them to ensure they are working properly. Here's how:
- Turn On the Power: After all the modules are installed and the cables are connected, turn on the power supply to the screen.
- Check the Display: Observe the screen to see if the new modules are displaying correctly. Look for any signs of dead pixels, color inconsistencies, or other issues.
- Run a Test Pattern: If possible, run a test pattern on the screen to check the functionality of the new modules. This will help you identify any potential issues and ensure that the screen is working properly.
Troubleshooting Common Issues
Even with careful installation and testing, you may encounter some issues with the new modules. Here are some common issues and their possible solutions:
- Dead Pixels: If you notice any dead pixels on the screen, try gently tapping the module to see if the pixel comes back to life. If the problem persists, you may need to replace the module again.
- Color Inconsistencies: Color inconsistencies can be caused by a variety of factors, including incorrect cable connections, faulty modules, or calibration issues. Check the cable connections and make sure they are secure. If the problem persists, you may need to recalibrate the screen or replace the faulty module.
- Loose Connections: Loose connections can cause intermittent display issues or complete failure of the module. Check all the cable connections and make sure they are tight. If necessary, use a wrench to tighten any loose components.
Conclusion
Replacing the modules of a large outdoor LED screen is a complex but manageable task that requires careful planning, preparation, and attention to detail. By following the steps outlined in this blog post and using the right tools and materials, you can ensure a successful module replacement and maintain the optimal performance of your screen.
If you're interested in purchasing high-quality large outdoor LED screens or need assistance with module replacement or other maintenance tasks, please don't hesitate to contact us. Our team of experts is always ready to help you find the best solutions for your specific needs.
References
- LED Display Technology Handbook, Third Edition by Joe Fjelstad
- Outdoor LED Display Installation and Maintenance Guide by ABC Corporation
- Understanding LED Lighting by John Bennet


